
What’s in a name? Scoutbook is undergoing some naming changes. The traditional tool that has gone by the name in the past is still called Scoutbook. Internet Advancement is being renamed Scoutbook Plus. You will be utilizing Scoutbook Plus to track advancements. Sometimes we will direct you to screens that are in the traditional Scoutbook. By and large, you shouldn’t need to worry to much about where you are, the system will display the appropriate screens for you automatically.
The data is shared between the two user interfaces.
If your unit has never used Scoutbook or Scoutbook Plus before, one of your Key 3 members, or Key 3 Delegate should login to my.scouting.org and setup unit functional roles for the unit in Position Manager. Instructions for that tool are here. Someone who has a key 3 or key 3 delegate role should proceed with the instructions below to setup the unit in Scoutbook Plus.
The term “Key 3” is a Scouting America term, not a Scoutbook term. Key 3 refers to the team of the unit leader (Cubmaster, Scoutmaster, Crew Advisor or Ship Skipper), the unit Committee Chairman, and the Chartered Organization Representative. For more definitions, see the Language of Scouting.
Parents and Scouts
We recommend that parent and Scouts use the Scouting App. Information for the app is located here.
Please note that Parents who are not also leaders in the unit, and Scouts cannot approve (sign off) on advancements. They can mark them ‘completed’ which just means someone thinks the Scout is done with the advancement, but it is not a sign off.
How to Login for Unit Volunteers
You can login to Scoutbook Plus by going to advancements.scouting.org and using your my.Scouting credentials. This is the same username and password you used to register and take online training.
Login issues are usually resolved by resetting your password. On the Scoutbook Plus login prompt select Forgot Username / Password? If you still have difficulties logging in, reach out to your local council or visit the forums here.
After you login, click on the pulldown menu in the upper right to see which positions you have associated with the login credentials. Select your Pack leadership position to continue.
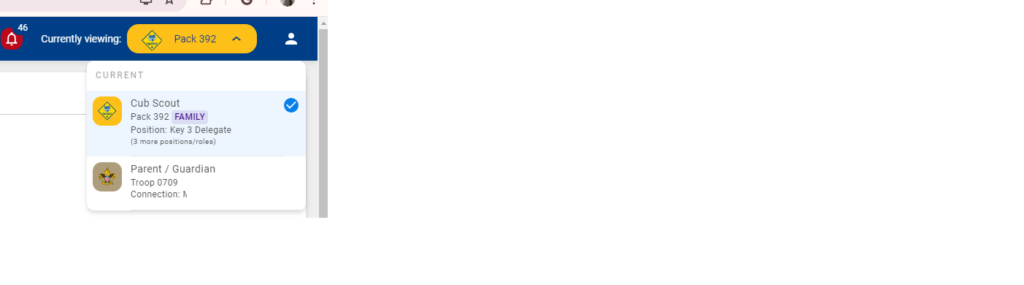
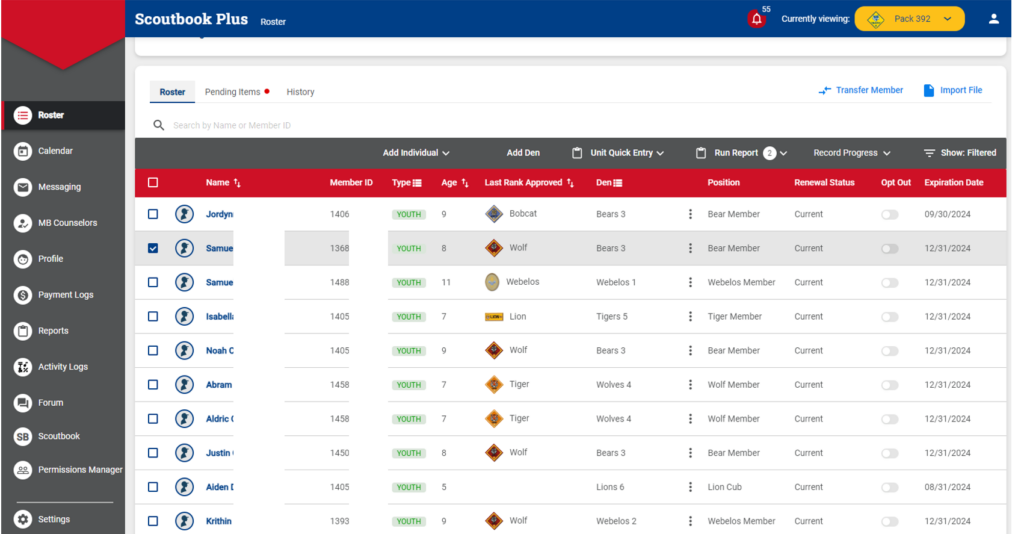
At this point you should see your Pack Roster.
Creating Dens and Assigning Scouts
Scoutbook Plus automatically brings in Scouts and leaders to your Scoutbook Plus Pack Roster page who are registered in your unit by your council. You will want to create Dens in Scoutbook Plus and assign Scouts and Den Leaders to them.
First click on the Den heading on the roster page. This is a toggle that will display any already existing dens.

To add new dens, select the Add Den menu item from the Roster Page

This will send you to the Create Den Page:

From here you can create new dens and add people to the new dens. New dens may take a few minutes to appear on the Scoutbook Plus roster.
Editing and Advancing Already Existing Dens
Clicking the Den toolbar option displays your dens. To see Den Leaders assigned to existing dens use the Show Filtered option to the right of the toolbar (more on that later in this guide.)
You can modify den information of existing dens by clicking on the Den menu and then the Edit button for the correct den.

When you do this, you will be sent to the Edit Den page.
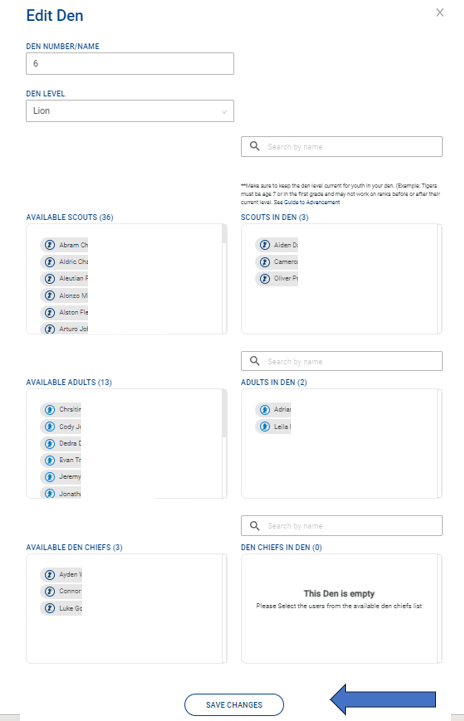
From here you can change the Den information (name, number, etc.)
NOTE: Changes may take a few minutes to be reflected on the Scoutbook Plus roster.
You can also promote or demote a den (change the Den Level.) That is advance it from Lion to Tiger, Wolf to Bear, etc. You can also demote it to a previous level if you wish. You have complete control.
You can also add people to the den and remove them from the den.
This is also where you would assign Den Chiefs to the den. For more help on assigning Den Chiefs, see our guide here.
Remember to save your work at the bottom of the page.
NOTE: Wait for adults and Scouts to appear on your rosters. They will appear to be available to be assigned to dens 24 hours after they are officially registered.
Viewing Adults in your Pack
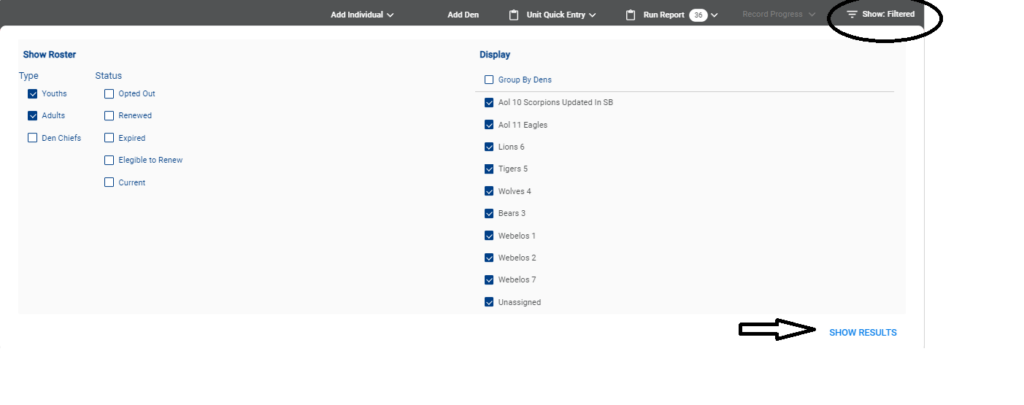
From the Roster page, click on the Show: Filtered button on the right of the toolbar. Then click on Adults. You can filter the roster any way you wish from here. Click Show Results to save your filter.
Setting up Parents / Guardians
Parents and guardians will now automatically be added to their Scout’s record when the Scout is registered and is brought into your unit by the system. If you do not see a parent or guardian associated with a Scout, contact your local council Registrar and ask them to make the association in their system. Once they do, it will be reflected in Scoutbook Plus in 24 hours.
Setting up Scouts
Scouts will automatically appear on your Scoutbook Plus roster within 24 hours of their official registration with your unit.
Entering Advancements
Click on the Scout’s name in the Roster screen.
A new Screen will show the Scout’s advancement progress.

If you click on the View More button (to the right) you can drill down and look at the requirements for the badge they are working on. Note it shows the 6 required adventures at the top and the possible elective adventures at the bottom. It also indicates if the Scout has started working on any of the adventures, or if they have completed any.
Leaders are able to add advancement credit for previous ranks (for bookkeeping purposes.) For example, a leader may approve Tiger advancements for a Scout who is currently in a Wolf den. Note that parents and Scouts do not have this capability.
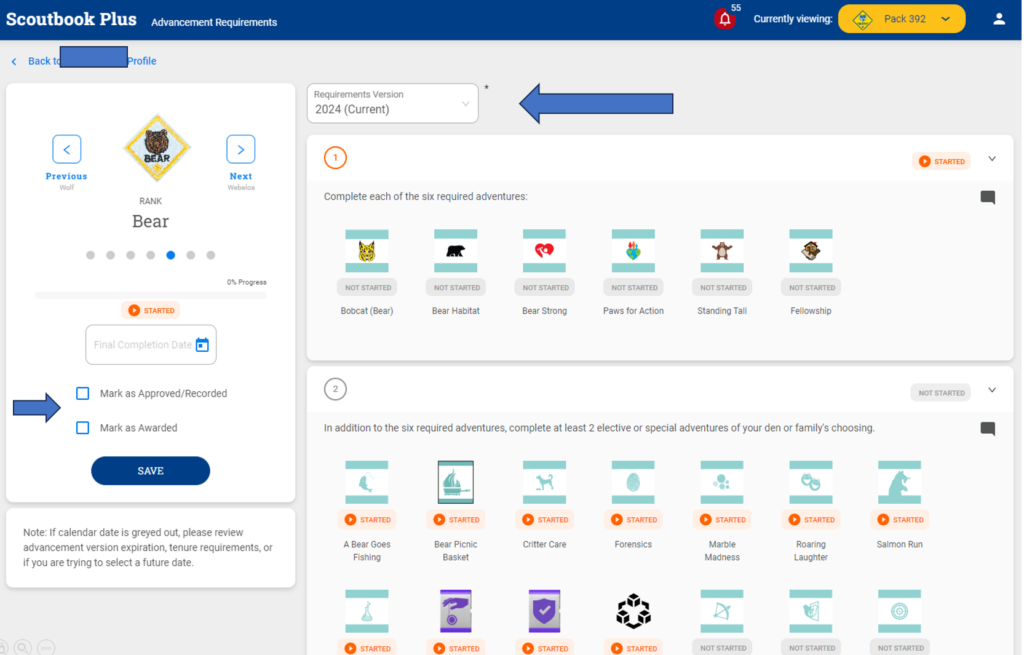
Scoutbook Plus will default to the current 2024 requirements. If you would like to work on the previous year’s requirements, you will be able to, through August 2024, by selecting the requirement’s version year at the top.
To the left you can mark an entire rank as approved or awarded.
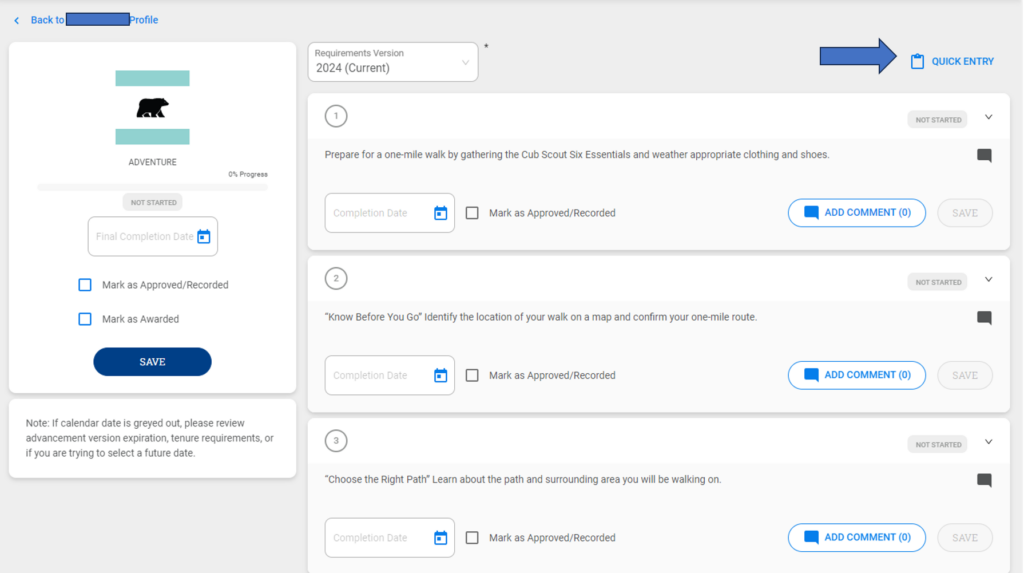
When you click on an adventure, you will go to the next screen.
(note: Photo support in comments will be available soon)
From here, you can mark individual requirements as completed or approved (leaders only,) and add comments. This is similar to the functionality in the traditional Scoutbook. Remember to Save your work.
What the Different Advancement Statuses Mean
The statuses that are used throughout various parts of Scoutbook Plus are listed below.
1. Started – means in progress
2. Completed – means the youth has completed the item but it needs approval from their unit leader. This can be entered by a leader, parent or Scout. It also can be entered with either Scoutbook.com or in the Scouting Mobile App
3. Approved – The unit leader has verified (i.e., “signed off”) that the youth has completed all requirements. (As far as Scouting America is concerned this youth has earned this advancement.)
4. Awarded (optional) – Some units like to have a way to keep track of which advancements have been approved but not yet presented to the youth. This is where the “Awarded” status comes in. A unit leader can choose to mark all advancements which have been presented to their youth as “Awarded”. (Note: this will remove any advancement from Purchase Orders.)
Individual Quick Entry
If you click on Quick Entry on an individual Scout’s adventure page, you will have the ability to mark a number of requirements completed or approved for the Scout for that adventure.
Please note that Parents who are not also leaders in the unit, and Scouts cannot approve (sign off) on advancements. They can mark them ‘completed’ which just means someone thinks the Scout is done with the advancement, but it is not a sign off.
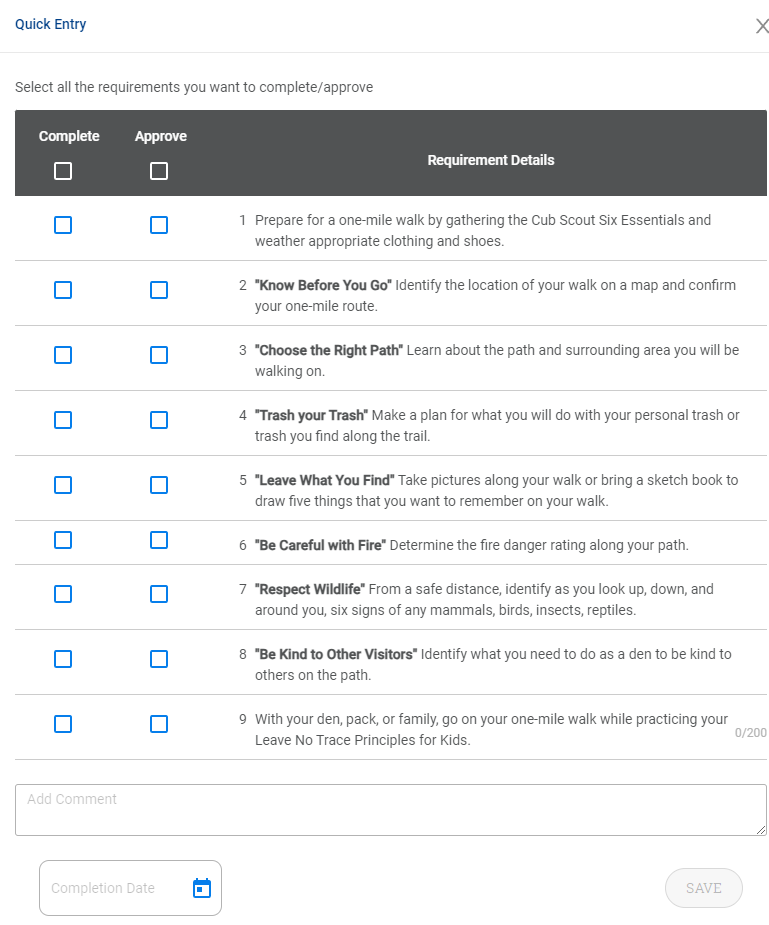
You can click on completed or both completed and approved for any number of requirements. (Note: if you select approved the completed box automatically is selected.)You can put in comments. You will need to put in a date at the bottom and click Save to save your work.
Unit Quick Entry
To enter adventures for a number of Scouts at one time: Select Unit Quick Entry, on the unit roster screen and then Enter Adventures. (Note: you do not see the ability to enter ranks in Quick Entry because ranks in Cub Scouts are totally based on Adventures.)
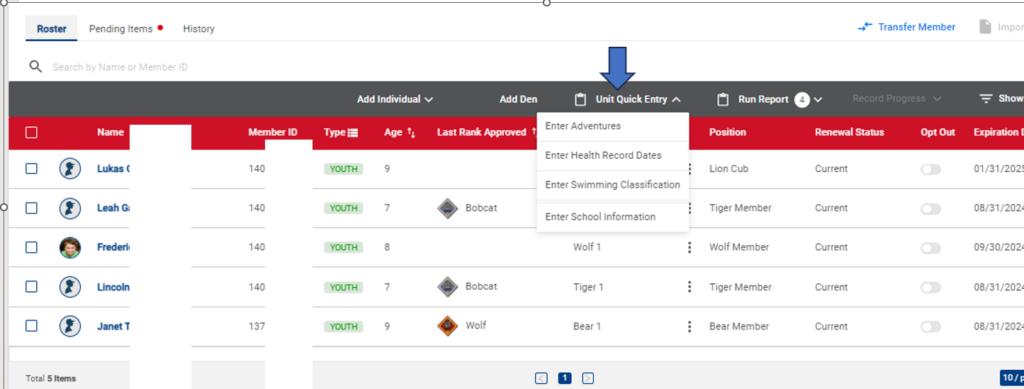
You will be sent to the Bulk Entry screen:

Select the Rank; Adventure; and Version you wish to work on and select Apply
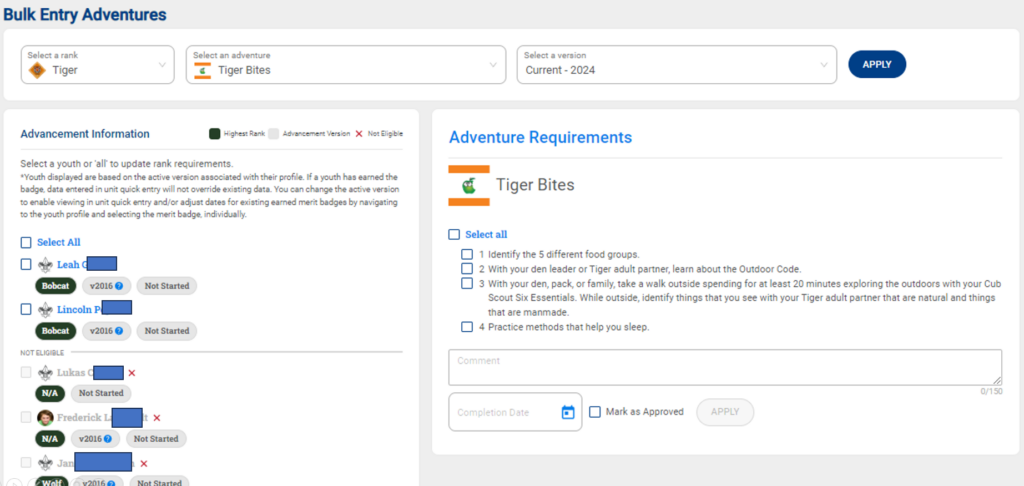
You will be presented with the Scouts who are eligible to earn the rank’s adventures on the left (note to be eligible, the Scout needs to be in the proper den to work on the rank.)
Select the Scout(s) you wish to work with, and on the right select the requirement(s) you wish to credit. Put in a date, mark approved (leader’s only) and select Apply
How to See if an Advancement is Marked Completed But Not Approved
Since advancements can be marked completed, but not signed off by a leader, you may want to see what they are. To view them, click on the Pending Item tab above the Roster Toolbar. From there you can take action on them by clicking on the Scout.

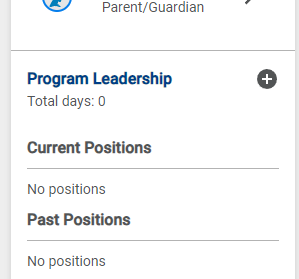
Adding Denner and Asst Denner Roles
You may add Denner and Asst Denner roles to a Scout by clicking on the Scout then click on the Program Leadership + on the left
Editing Profile Information
A member’s contact information is located in their Profile.
You can also add a photo of the member in the profile.
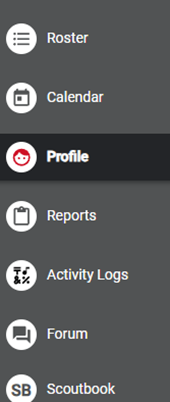
You can edit your own profile information by clicking Profile on the menu at the left of the Scoutbook Plus Roster page. Changes here will be reflected in the other Scouting America systems.
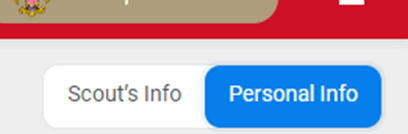
You can edit a Scout’s profile by clicking on their name on the roster page then clicking on the Personal Information tab at the upper right.
You can edit an adult’s profile information by displaying the adults on your roster page using the Show: Filtered button to the right of the Roster toolbar, and then clicking on their name.
Remember to save your work after making profile changes.
To change a profile picture: Go to the Profile and click on the camera icon next to the picture placeholder.

Unit Calendar
A guide to using the Scoutbook Plus calendar is here.
Recording Activities
You can track the progress of unit members in a number of activities is made fun and simple with the Activities module in Scoutbook Plus. Best of all – Any service hours recorded in Scoutbook Plus feed directly into Journey To Excellence (JTE).
- Campouts – Days, Nights, Frost Points
- Hikes – Miles, Elevation Change
- Service Projects – Hours
For information on how to record activities, please see the information here.
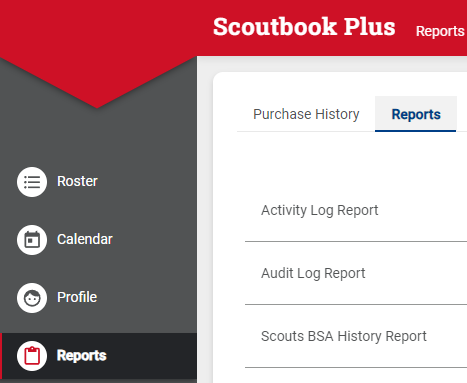
Reports
To run an advancement report to bring to the Scout Shop click on Run Report in the Roster toolbar. More information is here.

Previously created advancement reports can be found under the Reports menu on the left. Click on the Purchase History tab there.
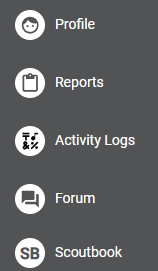
You can also click on the Scoutbook menu item on the left and use the Needs Purchasing Report and PO system in Scoutbook. A guide for using that feature is here.
There are a number of other reports available from the Run Report pull down on the Roster toolbar and the Reports menu > Reports Tab to the left of the Roster.
The reports in Scoutbook are also available to you. Click on Scoutbook on the left hand menu, then click on your unit, then reports.
Recording Awards
Most Cub Scout awards were eliminated on June 1, 2024. There are some awards still available to Cub Scouts. To record awards, click on the Scoutbook menu item on the left, click on your unit in Scoutbook then the Den, then Scout then their awards menu. You can also use Quick Entry inside the traditional Scoutbook to record awards.
Messaging
To send out emails to your unit: Click on Scoutbook on the left hand menu. Click on Send Message.
You can send text messages with this feature as well. Note that the person to receive the text must have indicated a mobile phone, phone service provider, and checked the box to allow text messaging in their profile for them to receive text messages.
Payment Logs
Scoutbook Payment Logs are available to you via the Scoutbook menu on the left of the Scoutbook Plus Roster page. For more information on Payment Logs, please see our help guide here.
Forums
The forums are a place where you can ask and obtain technical information to help you use the different Scouting America systems. To access the forums: click on Forum on the menu to the left on the Roster page.
Transferring Members
If you need to transfer members to and from your unit, click on Transfer Members above the Roster toolbar.

More Help
For more help and troubleshooting:
Online Helps https://help.scoutbook.scouting.org/
Forums https://discussions.scouting.org/
For registration assistance: Please contact your local council Registrar