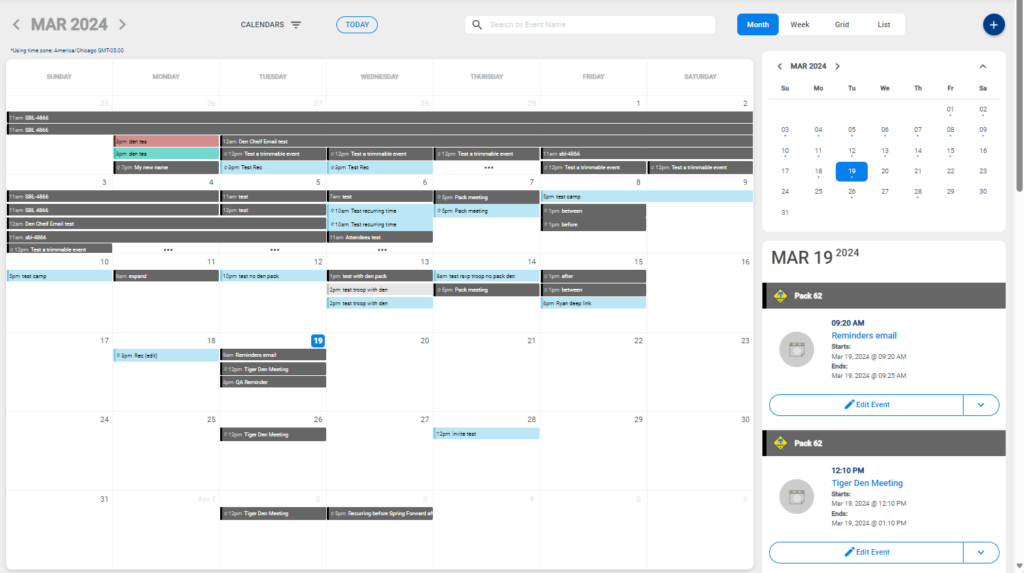
Use Internet Advancement Calendar to schedule events for your Pack, Den (dens included) Troop (patrols included), Crew and/or Ship.
Calendar event creation and attendance permissions are currently limited to the following positions:

CHECK YOUR TIME ZONE
IMPORTANT: Before using the calendar for the first time, make sure your unit’s time zone is set correctly. Select your unit in the drop down (top right) in Internet Advancement. Then click on the gear icon and select settings. Scroll down to see or adjust the Unit time zone. (see the FAQ below for more information)

ACCESSING THE CALENDAR
You access Internet Advancement Calendar from Internet Advancement (https://advancements.scouting.org/)
Make sure you are viewing your unit and position (you can change units or positions, if needed, with the upper right pull down menu,)

then click on Calendar in the menu to the left.

CREATING AN EVENT
Click on the start date for your event then on the plus sign in the upper right of the calendar screen.

You can select that you are creating an event (used for meetings and future events). If you are just creating an activity log, click Activity Logs from the left hand side menu and click “+ New Activity Log.” Please note that Activity Logs can be created within the event once the event has concluded. For more information on how to enter activities, please see our guide here.

Verify or change the calendar you are placing the event on. You can have your event on multiple calendars.

Put in an event name, Start Date and End date (if it is a repeating event, be sure to click the checkbox for “Repeat Event” and put in the first occurrence of the series.
Put in a start time and end time.
Put in a description of the event and any additional notes.
If you would like to require permission slips, click the Required Permission Slip box. This will provide the BSA standard permission slip to be available to the attendees for download.

Select “Event with RSVP” if you are looking for the participants to RSVP. Make sure you have attendees identified so the RSVP system will work for the event.
Put in a location (optional) and if you have a URL to a map of the location
You can select event reminders and enter what you wish to say in your reminder. Then select when you wish the reminder to go out. . The maximum amount of reminders is three.
Add and adjust the attendees to your event on the right side of the screen. For external guests, click the External Guests dropdown menu and click Add External Guest.

Remember to click Create Event to save your calendar event.

EDITING AN EVENT
To edit, duplicate or delete an existing event: go to your calendar, click on the event, and edit button next to the words EVENT INFORMATION. Note: Events in the future that are part of a recurring events will have additional options.

RECURRING EVENTS
Recurring events are indicated on the calendar with the circle/arrow icon next to the event time. You can delete future series events after a future date or after today’s date. Note: You may not delete past events in bulk that are part of a series as they may include important attendance information. You will need to delete those, individually.)
You may also edit future series events (Be aware: If you changed specific events in the series (deleted an event, modified a time or invitees) your changes will be cancelled and those events will match the series again (i.e. events will be restored, time and invitees will be the same across all events according to this event.)
And you can edit series future invitees, which will only change the list of invitees across all future series events only).
EVENT RSVP
If you click the box Event with RSVP in your event edit screen, your event will support RSVPs.
IMPORTANT: If you wish your event to collect RSVPs, make sure this box is checked.

The results of attendee’s replies will be shown on the upper right of the Edit screen.

You can also answer for them by clicking on Quick Entry RSVP.
Members can also RSVP by going to the calendar and clicking on the event. When they click on the event they will see a button pull down to click:

There is an RSVP report available for the events that are collection RSVPs. Click on the RSVP Report button.
ATTENDANCE
The invitees will turn into ‘attended’ after the event. You are able to edit who did and did not attend similarly to editing invitees.

Changing the Color of the Event Indicator for a Calendar
To change the color of a calendar’s color indicator, click on the color pallet next to the calendar in the lower right side ==> Then move the lower circle to the correct color range, and the upper circle to the color you prefer, and click OK.

ADDING / LINKING EVENTS TO ACTIVITIES
The calendar feature in Internet Advancement provides the ability for users to create activity logs within calendar events after events have occurred. Activities created within a calendar event will auto-populate with event attendees and some event information that can be adjusted (in case users would like to give the activity a specific name or remove/add individuals who may or may not have attended the full event).
NOTE: Currently the system adds everyone who was invited to the event as a participant in the activity. Remove those, from the activity, who did not attend and you do not wish to be included. (The plan is to have an option to include only those marked attended, but that is not in the system yet.)
Users may create activity logs without linking the activity to an event by entering the activity in “Activity Logs.” This method may be used when adding an activity log that may not have been associated with a publicized unit event.
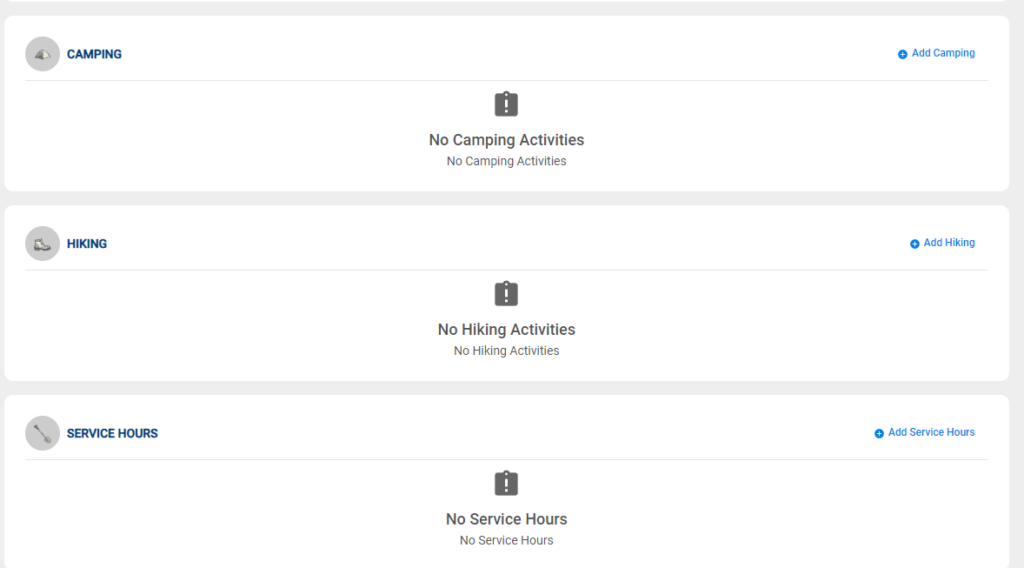
To reconcile activities (add/edit/delete) that were associated with the event after the event has concluded, scroll down to the bottom of the page. Click “Add Camping/Hiking/Service Hours” The people who were invited to the event will be listed in the activity. You can then adjust who attended the activity if not all of them participated.

REPORTS
RSVP Report

There is an RSVP report available for the events that are collection RSVPs. Click on the RSVP Report button.
EXPORTING TO ANOTHER CALENDARING SYSTEM
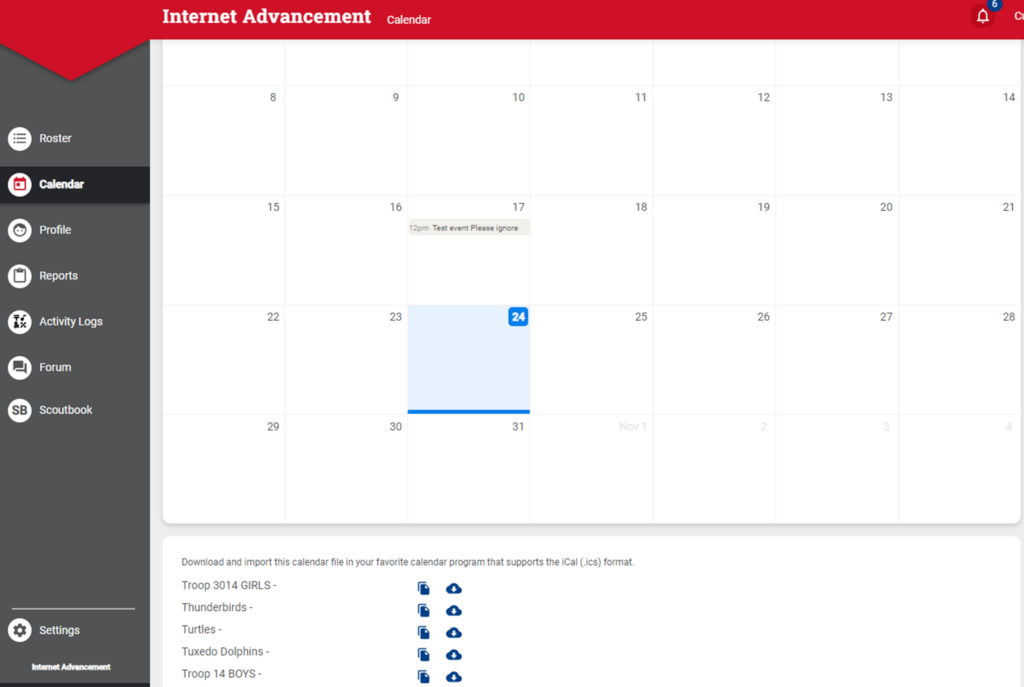
You can link a .ics URL to your third party tool The links are available at the bottom of the calendar screen. They look like this:


How to Subscribe Your IA Calendar
See our guide here on how to subscribe your IA calendars to your phone or other calendaring system. You can use this as a template for making a unit guide on how to subscribe to your calendars.. PDF Word
We have received reports that syncing is intermittent with Google Calendar. This seems to be an issue with Google. Troubleshooting for the Google Calendar can be found here. Google Calendar support is here.
Exporting from IA Calendar to Outlook with an .iCal format URL
- Click on the .iCal icon shown above to copy the link to your clipboard
- Open your Outlook calendar, select Add > From Internet.
- Paste the URL from your internet calendar and select OK.
- Outlook asks if you would like to add this calendar and subscribe to updates. Select Yes.
Your calendar items appear and will synchronize. Any calendar can be turned on/off in the Folder Pane.Select the arrow to overlay the calendar if you want.
FREQUENTLY ASKED QUESTIONS
Q. Does an event automatically record a corresponding advancement requirement?
A. No, not at this time.
Q. Can we import another calendar using iCAL to the Internet Calendar?
A. No
Q. How can I change a single occurrence event to a recurring event?
A. Delete the event and create a new recurring event, or create a recurring event starting at the next occurrence of your event.
Q. How does the time zone work in Internet Advancement Calendar?
A. IA Calendar saves the time in Central Time. If the event is at 7pm it will save it based upon the units relation to the Central time zone. If you are out of the unit’s time zone when you view the event, it will show the time of the event in your unit’s time zone first and add a second line with the time in your device’s (local) time zone. And if you are in your unit’s time zone it won’t show a different local time.
Need More Assistance?
Please ask on the forums, here:
https://discussions.scouting.org/
