
Transferring units
There are several different tools available to transfer scouts (and sometimes adults). Using one of the online transfer tools is the most efficient way to transfer a Scout (or adult) from one unit to another. A paper application is typically not needed. All transfers will appear in Scoutbook 24 to 48 hours after the transfer is accepted by the receiving unit.
The different tools are available for the following scenarios:
· In-council transfer initiated by the unit they are leaving
· In-council transfer initiated by the parents
· Out-of-council transfer initiated by the parents
In-council transfer initiated by the unit they are leaving
NOTICE: Do not transfer a Cub Scout to a Boy Scout Troop if you are not sure that they won’t need to be brought back to the Pack for advancement recording. So, just be sure that you want to transfer them before you do.
This tool works for in-council transfers of youth only. Online apps do not need to be turned on for this to work.
A common issue is that the parent is not set with the parent relationship in Akela. If that is an issue, the family will need to work with the council they are transferring from before this can be used.
Unit key 3 or key 3 delegates can transfer youth by going to the new “Roster” feature in the Roster tool and “Organization Manager” and select the youth who need to be transferred, then click the “Transfer” icon. Select the unit type and type in the unit number. Note that leading zeroes must be entered if the unit is less than 4 digits. This will create a transfer application which will be sent to the new unit with the ability to be approved in “Application Manager”.
Steps by the Pack, Troop or Crew the Scout is registered in now:
Step 1: One of the Key 3 (or Key 3 delegates) logs into their
www.my.scouting.org account.
Step 2: Go to Menu and Click on the unit the Scout or adult is registered in now
Step 3: From the dropdown, select Roster
Step 4: From the Roster, select (click) the youth(s) to transfer (one or a group)
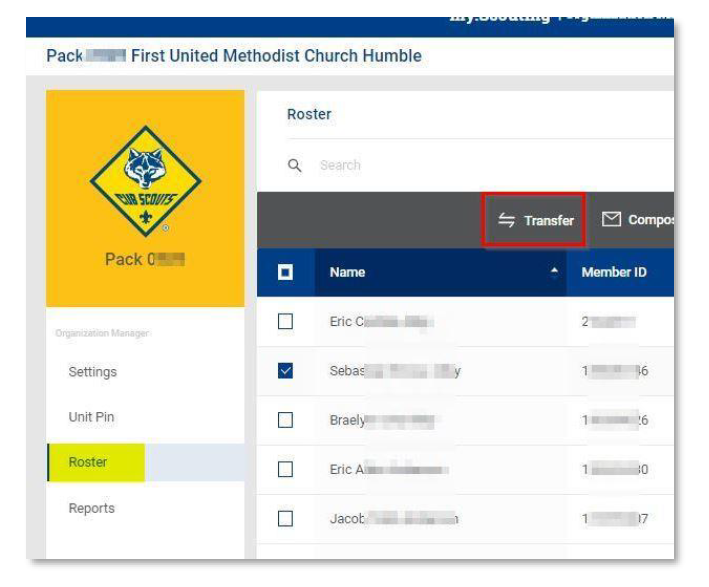
Step 5: In the gray ribbon across the top of the roster, select (click) transfer
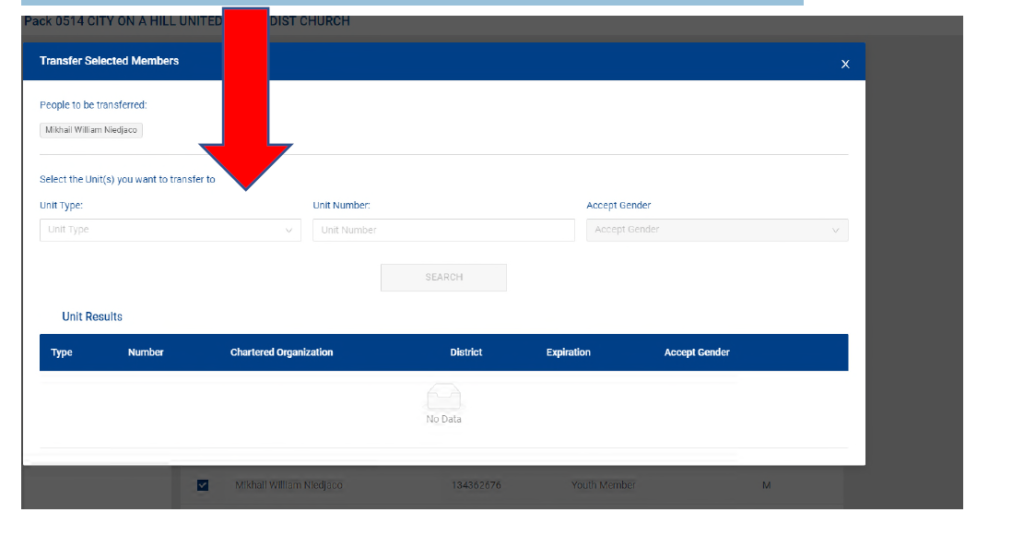
Step 6: Select the Units you want to transfer to – click “Unit Type” and select,
click “Unit Number” and enter the number (must be 4 numbers, so 7 is 0007),
and enter gender (boys/girls), then click “Search”:
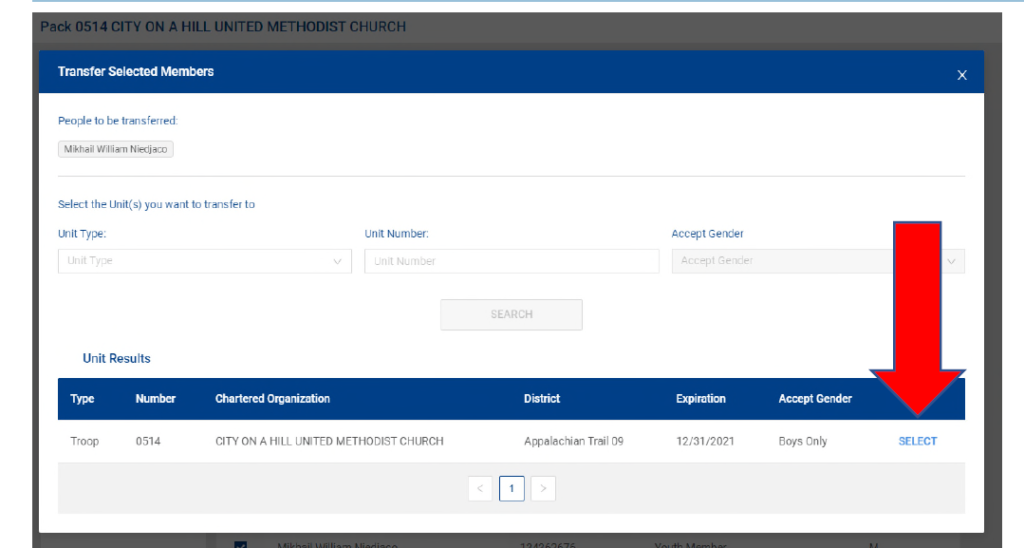
Step 8: Unit Results will appear from your “Search”, Click Select on the right Unit:
Step 7: If you get this flag warning:

This BSA piece asks “What are reasons I cannot transfer a youth?” with 2 reasons:
“Only youth in our database with a “parent relationship” can be transferred so a notification can be made.
This relationship can be corrected in ScoutNet, contact your scout office to have them make this
connection.” So call the Volunteer Service Center at 770.989.8820 and connect with the Program Center; or contact your favorite Program Service helper at https://www.atlantabsa.org/camp-program-staff.
“Youth that are too young to join a unit will not be able to transfer (such as a Cub Scout joining a Venture Crew).” So check to be sure you’ve got the right Scout selected.
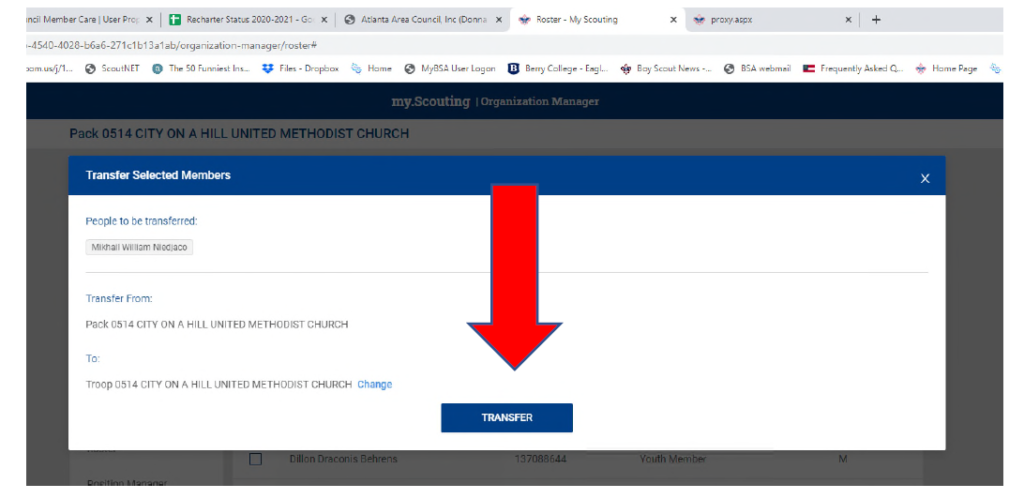
Step 8: Click Transfer to complete the exit process – and alert the unit you transferred to:
Part Two: Steps by the Pack, Troop or Crew receiving the transferring Scout:
For the Pack, Troop or Crew receiving the transfer:
Step 1: One of the Key 3 (or Key 3 delegates) logs into their
www.my.scouting.org account.
Step 2: Go to Menu and Click
Step 3: Go to the Unit Scout receiving the transfer, and click
Step 4: Select Application Manager
Step 5: Click on Pending Acceptance
Step 6: Click on the youth(s)
Step 7: Click Accept
Step 8: Check your roster, allow 24-48 hours for the Scout to appear in Scoutbook
A user guide (PDF) is available here.
In-council transfer initiated by the parents
This tool works for in-council transfers of youth and registered adults. Online apps do not need to be turned on for this to work.
A common issue is that the parent is not set with the parent relationship in Akela. If that is an issue, the family will need to work with the council they are transferring from before this can be used.
Log into my.scouting.org Select the Menu then Select “My Application;”
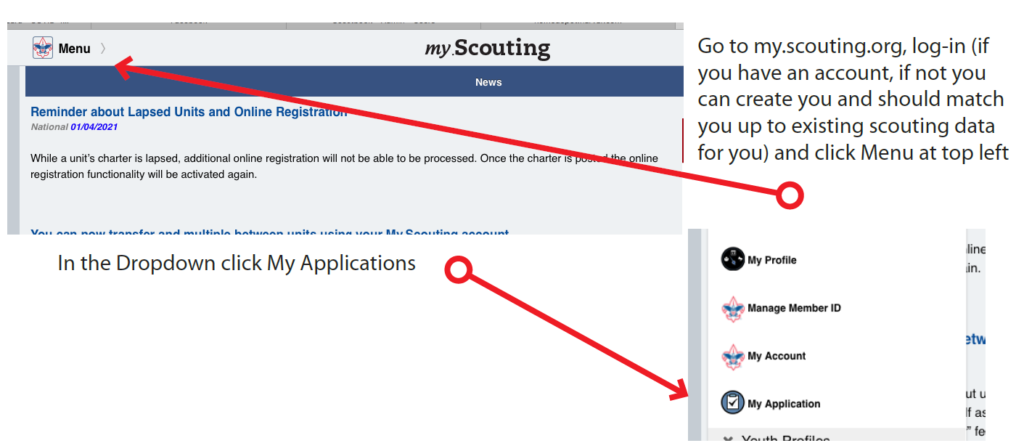
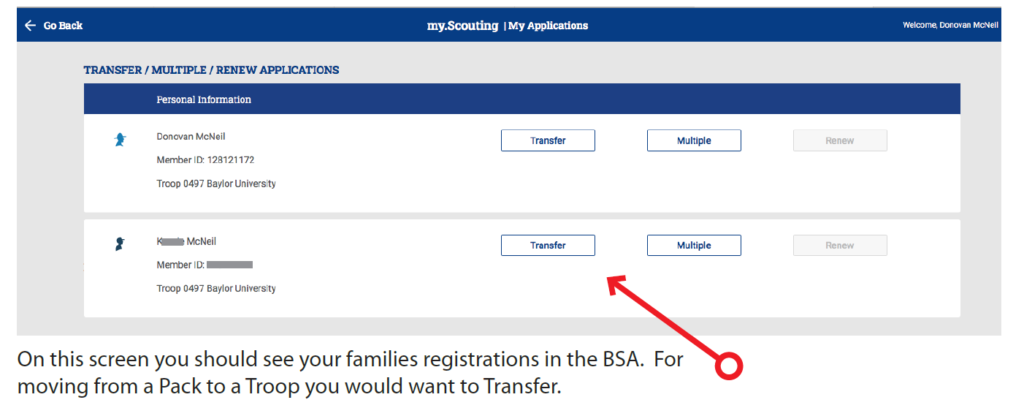
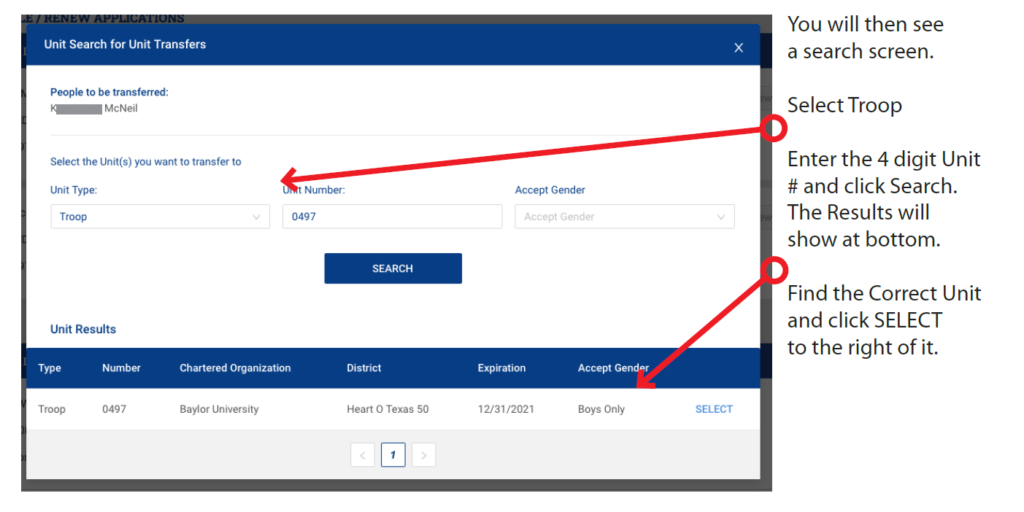
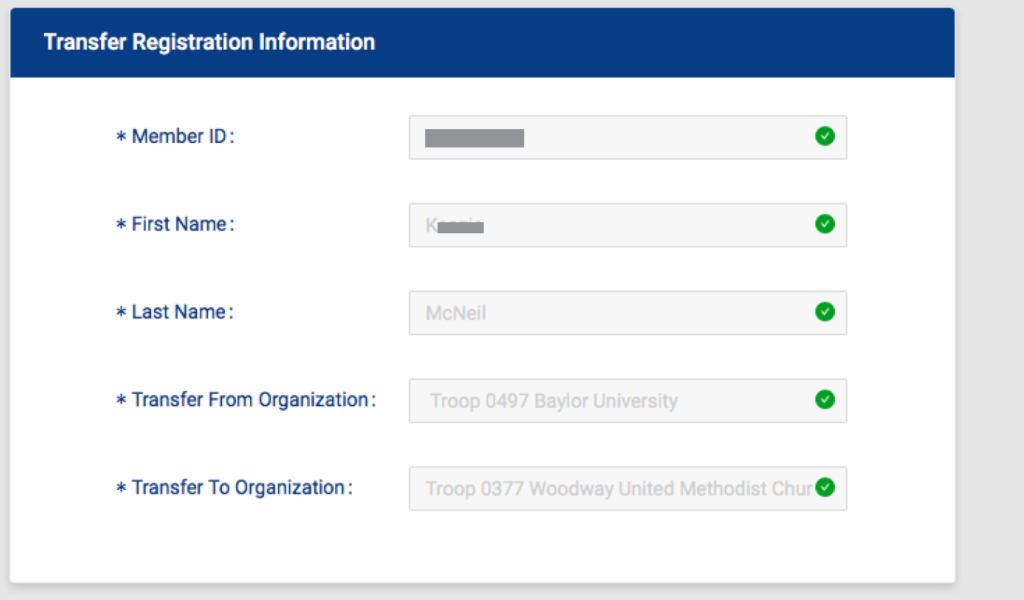
It will then take you to a Screen that should be 100% filled in for you to review. Then just click Submit Transfer.
Inform the Receiving Unit Leader that you have submitted an Application so they can take the needed steps to approve the application in application manager.
A user guide (PDF) is available here.
For the Pack, Troop or Crew receiving the transfer:
Step 1: One of the Key 3 (or Key 3 delegates) logs into their
www.my.scouting.org account.
Step 2: Go to Menu and Click
Step 3: Go to the Unit Scout receiving the transfer, and click
Step 4: Select Application Manager
Step 5: Click on Pending Acceptance
Step 6: Click on the youth(s)
Step 7: Click Accept
Step 8: Check your roster, allow 24-48 hours for the Scout to appear in Scoutbook
Out-of-council transfer initiated by the parents
Works for youth and adults for both in and out of council transfers, but the other options are easier for in-council transfers. The receiving unit and council must have online apps turned on for this to work. If a registered adult is transferring with this method with their child, the child must be completed first.
Transferring between councils.